IntelliJ Scala Plugin 05 Jul 2013
The IntelliJ Scala plugin v0.13.286 does a few things which were previously manual steps. This means that following the old documentation can lead to a few unhelpful error messages, when all you want is syntax highlighting, autocomplete and the occassional REPL support.
Assuming you start with a Gradle project using the Scala plugin and clean IntelliJ IDEA 12.1.4 install, the steps to add Scala support are:
File->Import Project. Select folder with parent build.gradle.- Import project from external model

- Select whether to use the gradle wrapper or a local installation, then finish import with default settings.
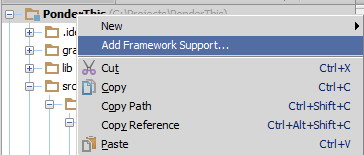
- Right-click parent folder in project structure, select
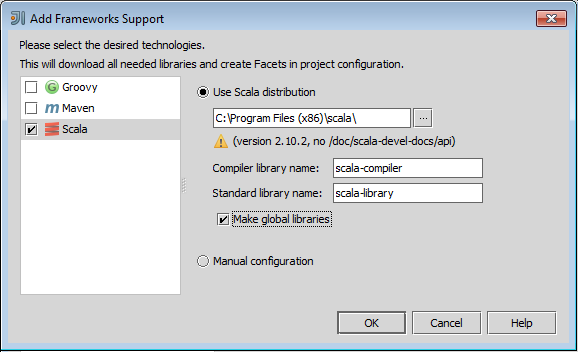
Add Framework Support....
- Depending on your Scala installation, some expected folders may be missing.
And finished. If you had existing scala-compiler/scala-library global libraries, or tried following some of the older plugin documentation, then you will likely find errors such as
Exception in thread "main" java.lang.NoClassDefFoundError: scala/reflect/internal/Trees
or
Please, adjust compiler library in Scala facet: no scala-compiler*.jar found.
This is just IntelliJ’s way of saying the the new way is much easier.